Chair Refurbishing
Holy cow, this is exciting.
First post on my new site!
If you’re new here,
[which I’m guessing you are since it’s been live for an hour now]then welcome!
This is my new blog to post DIY projects, redecorating ideas, tutorials and everything in between.
I’m a Pinterest fanatic [click the “p” over there to follow me———->]
so a lot of my ideas come from there.
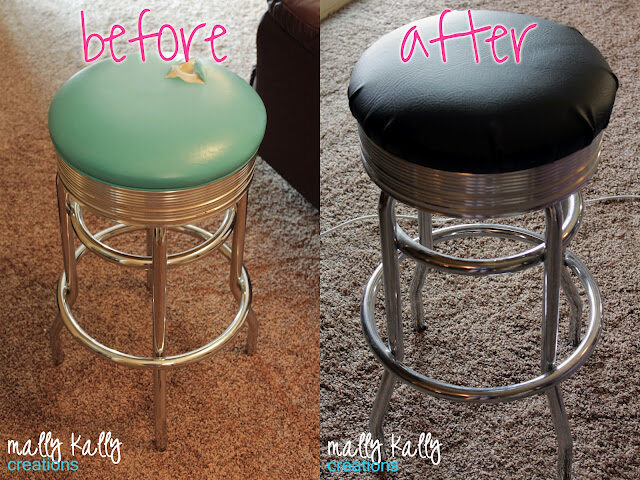
DIY: Bar Stool Re-Vamp
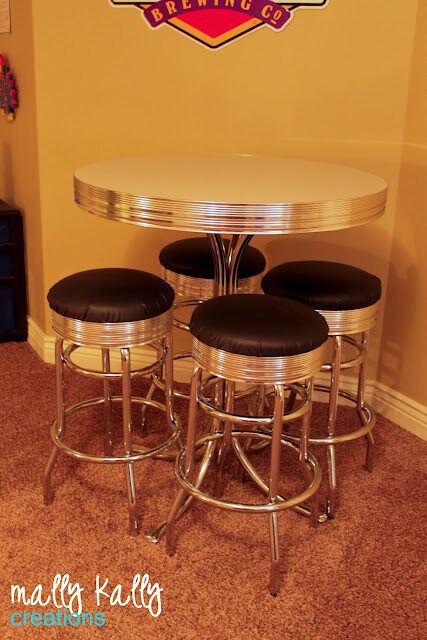
For this particular project, I had gotten a old school ice cream parlor table & chair set from my in-laws.
[sorry about the poor foto quality, it’s an oldie!]
When they moved to their new house, they were going to throw it out.
I begged convinced my husband that we needed it and we have stored it in our basement for the past 6 months.
When we did our basement remodel this past weekend, [posted on my other blog here] we decided that it did more “collecting crap” than it did actually seating anyone.
My sister & BIL just moved and they are in need of a table & chair set. She’s always been in love with this one & when she told me that her plan for the new kitchen was “old school Coca-Cola with red & black,” I had a creative fit in my head.
It would look perfect in her new kitchen!
If only I could reupholster those chairs……
Challenge accepted.
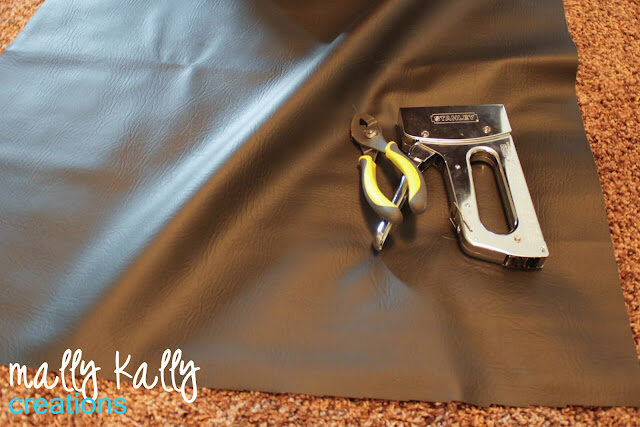
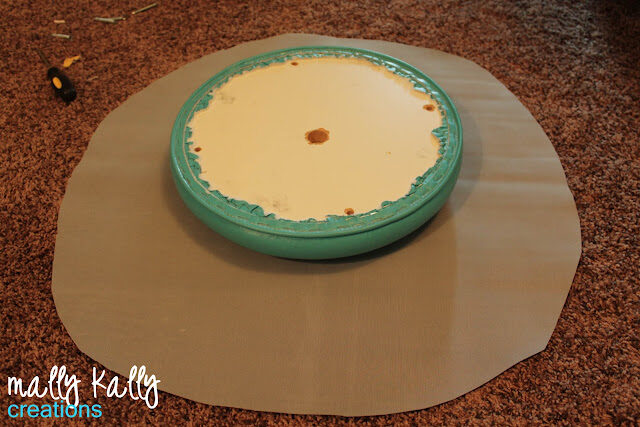
I got 2.5 yards of black vinyl from Hobby Lobby [that’s all they had, but it was the perfect size]
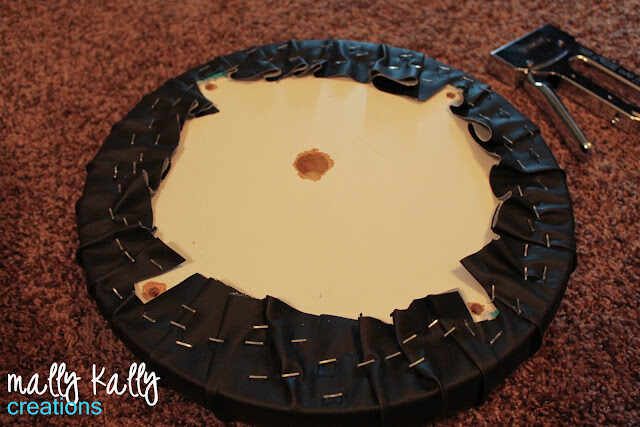
and monopolized my husband’s staple gun for the afternoon. Otherwise, the only tools I used were pliers [in case of screw-ups], scissors, and a phillip’s head screwdriver.
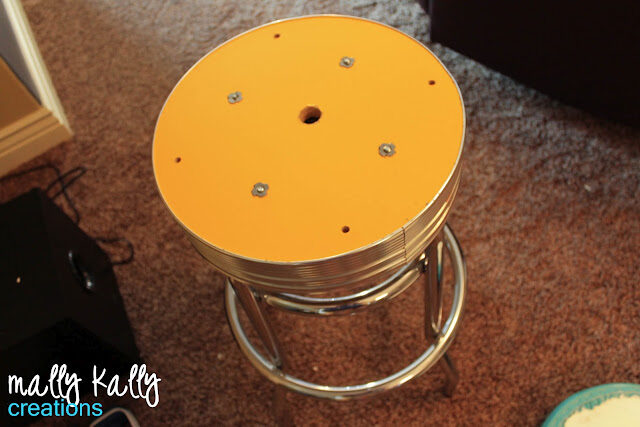
First, I unscrewed the top pad off the metal base.
Then I cut the vinyl into four square pieces & rounded the corners to make it easier. You don’t have to do this, I did it both ways and I don’t think it made much of a difference.
I stapled around the edges, doing 4 corners first so I could work from there.
I ended up leaving the old vinyl underneath it because it was stuck in there real good. [believe me, I tried]
And I often forgot that I needed to leave the 4 holes open where the screws drill into.
Oops.
That’s why the pliers are for. 🙂
After you’re done, say a small prayer that it will screw back on correctly
and then recite these words:
“Damn, I’m AWESOME!”
Because you are.
At least that’s how I felt.
I am the superwoman of reupholstering.
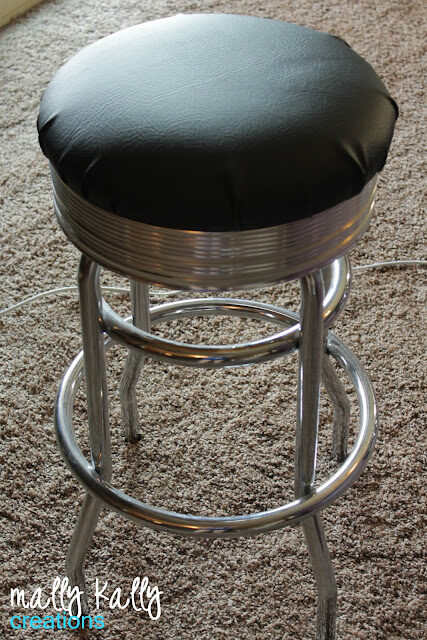
Alright, alright. You caught me. It wasn’t that hard. I finished in less than an hour. The hardest part was getting the hang of the staple gun.
After that, I was all sorts of pumped, so I got out my stuff from HL to make a front-door hanging.
I’ve seen some cute ones on Pinterest,
like so:
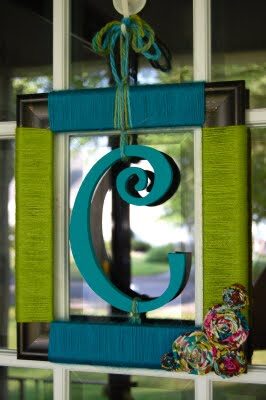 |
| blog here |
But I wanted to make my own version.
I got a cute curly “R” [$2.99 + 30% off]
and a blue frame that I wouldn’t have to paint [$20 + 50% off].
The wiring, lace & flowers I had lying around, as well as the spray paint I used for the letter.
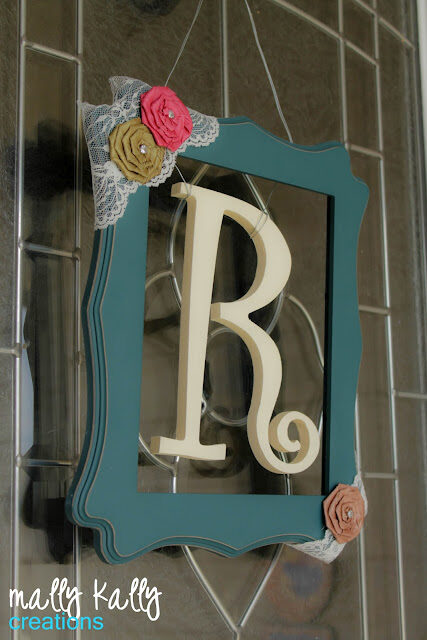
I sanded and spraypainted the letter first, then wired it to the top of the frame
[on the back there were some staples I could attach to].
Then I hot-glued the lace & flowers to it for embellishment.
And finally, I attached the wire at the top to hang it.
Total cost: $12 bucks
Score!
I almost picked up an “edging frame” for $20, which wasn’t 50% off, but was incredibly cute. Thankfully, I spotted this one which had glass & a back originally [for photos], but I easily took those out to make it look like the expensive edging frame.
Easy as pie.
Anywho – thanks for joining me for my very first post on mk-creations.com & hope to see you all back soon.
If you like any of the stuff you see and want to share it on Pinterest or Facebook, I would be honored [and super-grateful]!!
Don’t forget to hit “join this site” on the left side bar or subscribe via e-mail so you know when I post a new project!
peace out homies
&